Fortigate – Zone Lab
We can restrict incoming and outbound traffic by creating zones, which are groups of one or more FortiGate interfaces (physical or virtual). When interfaces and VLAN sub interfaces are grouped into zones, it becomes much easier to create security rules that several network segments can use using the same protection profiles and policy settings. You can choose which interfaces and VLAN sub interfaces to include in a zone when you create one. There is still a unique address for each interface. Interfaces are still the primary nodes for routing; zones have no bearing on this process. Controlling the flow of traffic within a zone is possible with the use of security regulations. In the following example configuration, for instance, three distinct user groups stand in for various entities within the company's network. There may be different VLANs and ports for each group in each location, but they can all share the same security settings and profiles to connect to the web. Simplifying management by providing the necessary interfaces to a zone and producing three policies instead of nine different security policies is possible.
Example Configuration
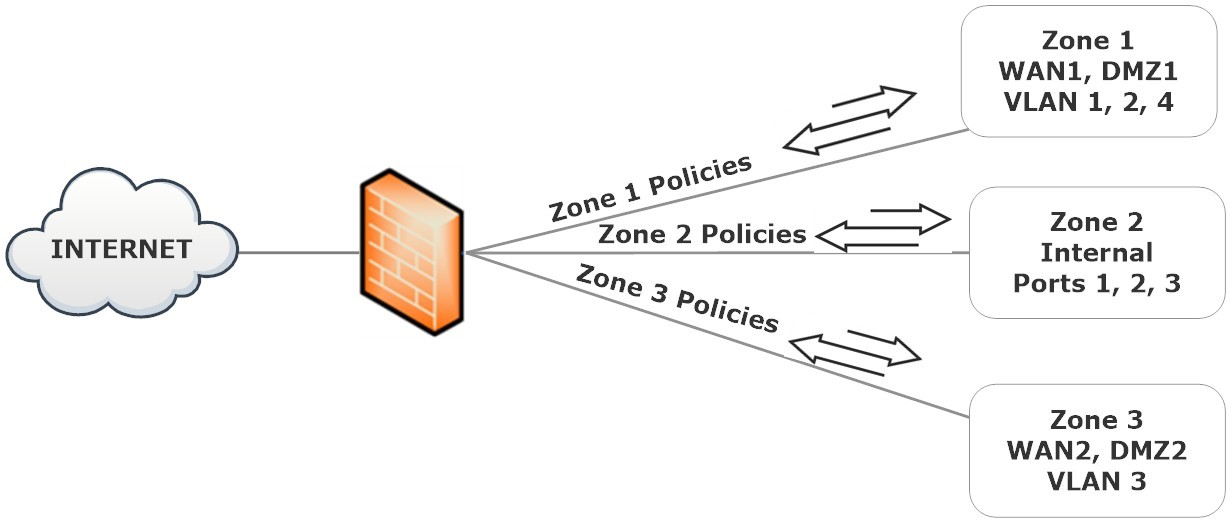
While policies can be set up for connections entering and leaving a zone, they cannot be set up for interfaces within the same zone. By way of illustration, a security policy can be established to traverse zone 1 to zone 3, but not WAN2 to WAN1 or WAN1 to DMZ1.
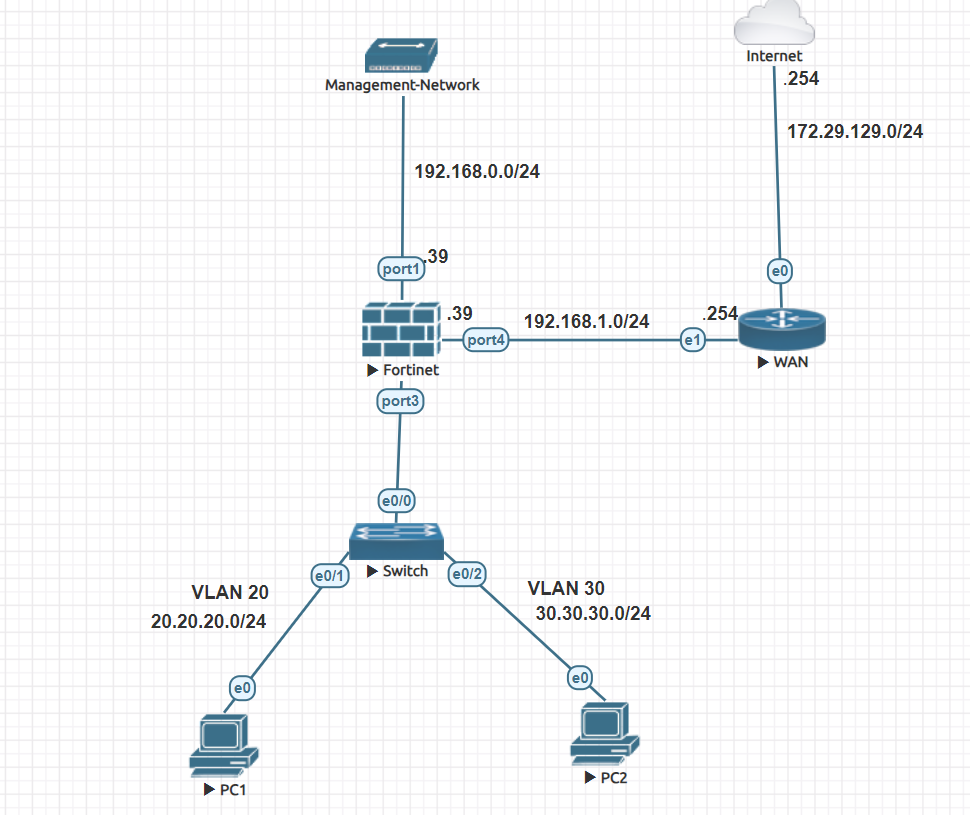
Below is the diagram for the lab related to zones:-
Solution:-
Step-1 – Create a Zone, Go to Network > Interfaces and then click Create New > Zone

Leave A Comment
Please login here to comment.
Comments